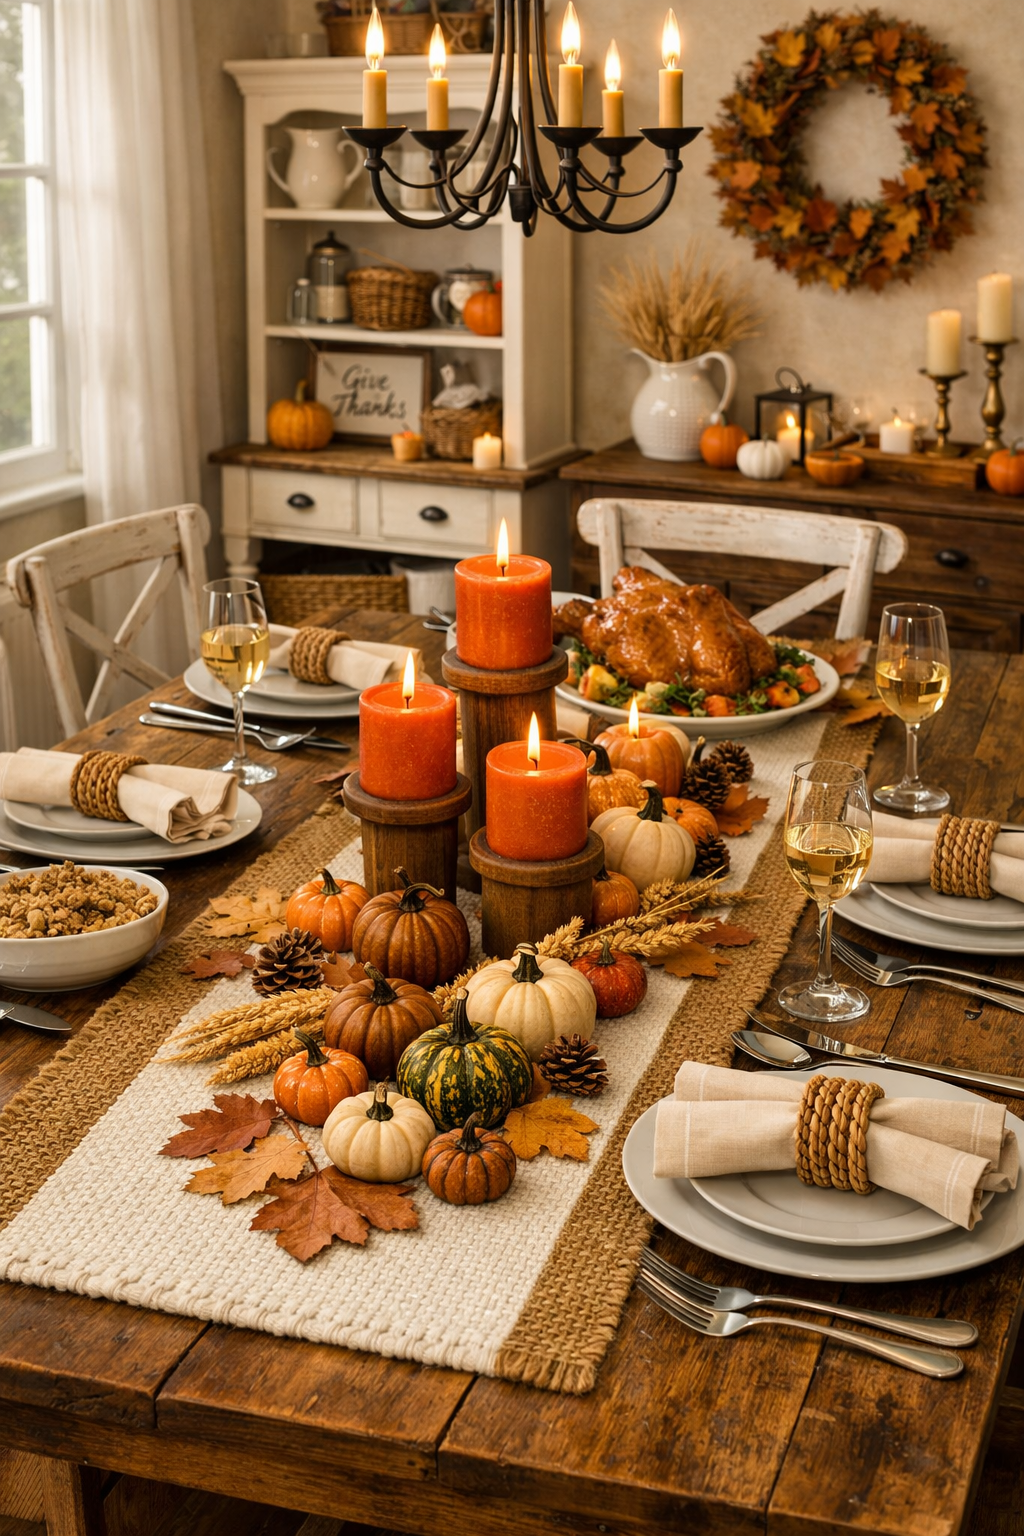
Thanksgiving is one of those holidays where the table itself becomes part of the celebration — everyone gathers around it, spends hours at it, and remembers how it felt to sit there. A beautifully styled tablescape doesn’t need to be complicated or expensive to pull off; it just needs a little layering and a handful of the right pieces.
This tutorial walks through exactly how to build a warm, farmhouse-style Thanksgiving centerpiece using a simple layering method — the same one we used for our tiered tray and mantle styling this fall. If you’ve followed along with those, this will feel familiar. If this is your first DIY with us, don’t worry — every step is broken down so you can follow along easily.
The Layering Method for a Beautiful Tablescape
Just like a tiered tray or a mantle, a table runner is essentially a long, narrow canvas that benefits from thinking in layers rather than just scattering decor randomly down the middle. Here’s the structure we’ll use:
1. The Base Layer — your table runner, which anchors the whole look and defines the “lane” everything else will sit within.
2. The Height Layer — candles at varying heights, which give your eye something to travel up and down as it moves along the table.
3. The Texture Layer — pumpkins, gourds, pinecones, and dried stems, which fill in the space around your candles with organic shape and color.
4. The Place Setting Layer — napkins and napkin rings at each seat, which extend the look beyond just the centerpiece and make the whole table feel intentionally styled.
Your Thanksgiving Tablescape Shopping List
Here’s everything you’ll need to recreate this look:
- Burlap Table Runner — This is your foundation. The neutral burlap tone works as a base for literally every other color in this palette.
- Burnt Orange Pillar Candles, Set of 3 — Hand-poured, dripless, and long-burning, these candles are the color anchor of the whole tablescape.
- Wooden Candle Holders — Varying heights here are key — this is what creates that layered, dimensional look down the center of your table.
- Wooden Pumpkin Decor Set — These rustic wood pumpkins add a different texture than the mini pumpkins alone, and their muted tones help balance out the brightness of the orange candles.
- Mini Pumpkins, Gourds & Leaves Set — The workhorse of this centerpiece. These fill in gaps, add color variation, and give you plenty of small pieces to tuck in around the candles.
- Dried Wheat Stems — Laid loosely along the runner, these add height and movement without overwhelming the smaller pieces around them.
- Cloth Napkins — Available in several colors, so you can pick whichever complements your existing dinnerware and tablecloth.
- Natural Water Hyacinth Napkin Rings, Set of 6 — These extend the natural, woven texture from the centerpiece out to each individual place setting.
- Pinecones — We used the same natural pinecones from our DIY Fall Accents tutorial. If you made extras from that project, this is a perfect place to use them.
How to Build Your Centerpiece Step by Step
- Lay your table runner down the center of the table first. Straighten it so it’s centered and even on both sides before adding anything else.
- Place your candle holders in the center of the runner, staggering the three different heights so no two are side by side at the same level. This becomes the visual anchor of the whole centerpiece.
- Add your candles to the holders, tallest candle on the tallest holder if your set varies in size, to reinforce the height layering.
- Start building out from the candles with your wooden pumpkin decor pieces, placing a few on each side of the candle cluster.
- Fill in with mini pumpkins and gourds, tucking them into any gaps around the wooden pumpkins and candle holders. Turn each pumpkin so its stem faces a slightly different direction — this small detail makes the arrangement look more natural and less staged.
- Lay your dried wheat stems loosely along the outer edges of the runner, letting them extend past the pumpkin cluster on one or both ends for added length and movement.
- Tuck pinecones into the remaining gaps, especially near the edges of the arrangement where things might otherwise look sparse.
- Scatter a few dried leaves (included in your mini pumpkin set) across the runner between the larger pieces — this final touch fills in any remaining bare spots and adds a “just fell from the tree” authenticity to the display.
- Set your place settings, folding each napkin and securing it with a napkin ring at every seat. This extends your centerpiece’s texture and color story to the whole table, not just the middle.
- Step back and check the balance. From the head of the table, your eye should travel smoothly from one end of the runner to the other, with the candles as the clear high point and everything else supporting that focal area.
Styling Tips for a Polished, Natural Look
- Resist the urge to make it too symmetrical. A tablescape with slightly uneven pumpkin placement and organic gaps reads as more natural and inviting than a perfectly mirrored arrangement.
- Vary your pumpkin sizes and colors deliberately. Mixing the wooden pumpkins, mini pumpkins, and the one green-and-white gourd (if your set includes one) creates visual interest that a single uniform color wouldn’t achieve.
- Keep the runner’s center clear enough for serving dishes if you’re using the table for the actual Thanksgiving meal — you may want to shift some of the centerpiece toward one end, or plan for a shorter arrangement if your table will be full of food.
- Light your candles about 20-30 minutes before guests arrive so the wax has time to pool slightly and the flames are steady, rather than lighting them right as everyone sits down.
Make It Last Beyond Thanksgiving
Many of these pieces — the candle holders, the wooden pumpkins, and the napkin rings especially — aren’t exclusively tied to Thanksgiving and can carry into a general fall or winter table setting well into December. Simply swap the burnt orange candles for a deep red or forest green, and you’ve got a completely different seasonal look using the same foundational pieces.
If you recreate this tablescape for your own Thanksgiving table, I’d love to see it! Tag your photos #HomecraftedHaven so we can share them.
This post contains affiliate links. If you make a purchase through one of these links, I may earn a small commission at no extra cost to you. Thank you for supporting Homecrafted Haven!
Leave a Reply