This post contains affiliate links. As an Amazon Associate, I earn from qualifying purchases at no extra cost to you.
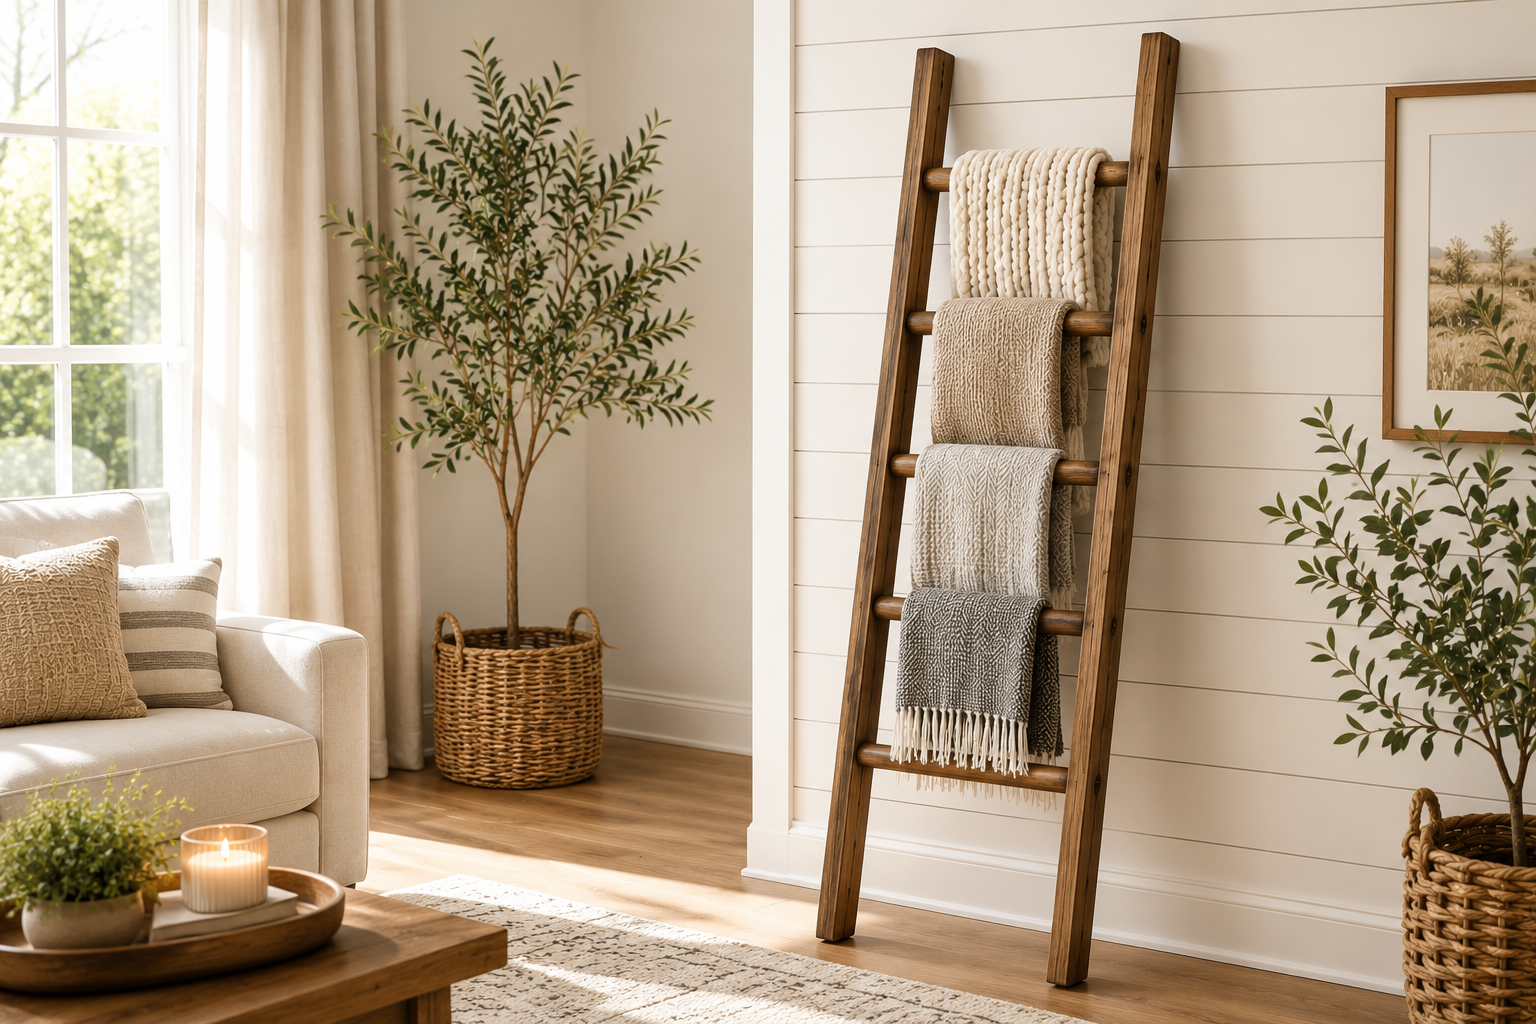
If you’ve been eyeing those blanket ladders in home decor stores and wincing at the price tag, good news — this is one of the easiest beginner woodworking projects you can tackle in an afternoon. With just a handful of materials and basic tools, you’ll have a beautiful, functional piece that adds instant cozy texture to any room.
Note: This ladder is designed for decorative use only and is not intended for climbing. Always use proper safety precautions when building and handling tools.
A quick note on the photos: step images are illustrative and may not perfectly reflect exact lengths, angles, or proportions. Always follow the written measurements and instructions below rather than measuring directly off the images.
Materials
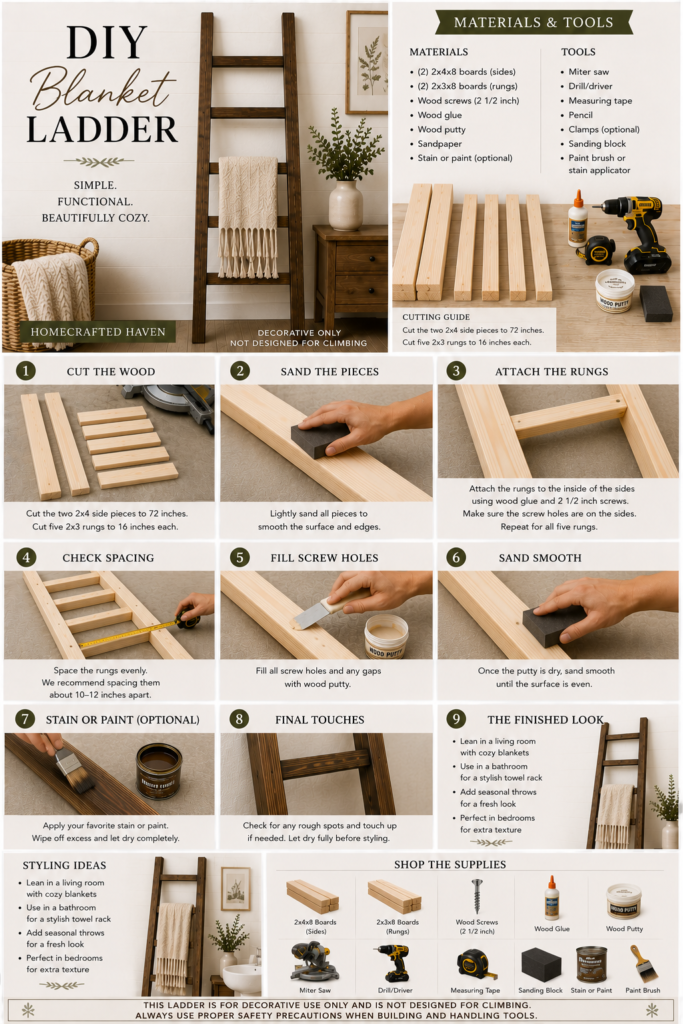
- (2) 2x4x8 boards (sides)
- (2) 2x3x8 boards (rungs)
- Wood screws (2 ½ inch)
- Wood glue
- Wood putty
- Sandpaper
- Stain (optional)
Tools
Cutting Guide
- Cut the two 2×4 side pieces to 72 inches
- Cut five 2×3 rungs to 16 inches each
Pro tip: If you don’t have a miter saw at home, most hardware stores will make a few cuts for you for free or a small fee when you purchase the lumber — just bring your exact measurements.
Step 1: Cut the Wood
Using your miter saw, cut the two 2×4 boards to 72 inches for the sides, and the five 2×3 boards to 16 inches each for the rungs.
Pro tip: Label each piece lightly in pencil as you cut so you don’t mix up your side pieces and rungs later — it’s an easy mix-up once you have seven boards laid out.
Step 2: Sand the Pieces
Lightly sand all pieces to smooth the surface and edges. Focus on any rough spots, especially where the wood was cut.
Pro tip: Sand with the wood grain, not against it — sanding against the grain can leave small scratches that show up more once you stain.
Step 3: Attach the Rungs
Attach the rungs to the inside of the side pieces using wood glue and 2 ½ inch screws. Make sure the screw holes are on the sides, and repeat for all five rungs.
Pro tip: Apply a thin, even line of wood glue before screwing — too much glue will squeeze out and create extra cleanup, but too little won’t hold as well over time. A bead about the width of a pencil is usually right.
Step 4: Check Spacing
Space the rungs evenly, about 10–12 inches apart, before securing them permanently.
Pro tip: Dry-fit all five rungs and step back to look at the spacing before you commit to any glue or screws. It’s much easier to adjust now than after everything is fastened.
Step 5: Fill Screw Holes
Fill all screw holes and any gaps with wood putty.
Pro tip: Slightly overfill each hole — putty shrinks a bit as it dries, so a small mound now will sand down to flush later instead of leaving a dip.
Step 6: Sand Smooth
Once the putty is fully dry, sand it smooth until the surface is even with the rest of the wood.
Pro tip: Run your hand over the puttied areas, not just your eyes — you’ll feel high spots you might miss visually, especially in natural light.
Step 7: Stain or Paint (Optional)
Apply your favorite stain or paint using a stain brush, wiping off excess and letting it dry completely before moving on.
Pro tip: Do a test swatch on a scrap piece of the same wood first. Stain color can look different depending on the wood grain, and it’s much easier to adjust before it’s on the full ladder.
Step 8: Final Touches
Check for any rough spots and touch up as needed. Let everything dry fully before styling.
Pro tip: Give it more drying time than you think it needs — even if stain feels dry to the touch, it can still transfer onto blankets if you style it too soon.
Step 9: The Finished Look
Your blanket ladder is ready to style! A few ideas to get you started:
- Lean it in a living room with cozy blankets draped over each rung
- Use it in a bathroom as a stylish towel rack
- Add seasonal throws for an easy seasonal refresh
- Perfect in a bedroom for extra texture and warmth
Styling Ideas
A blanket ladder is one of those pieces that works in almost any room:
- Living room: Lean it near a reading chair or sofa, layered with two or three folded throws in varying textures
- Bathroom: Swap blankets for rolled towels for a spa-like, boutique feel
- Bedroom: Use it to display an extra throw or quilt without taking up closet space
- Entryway: Drape a lightweight throw for guests, or use it to display a seasonal scarf collection
Final Thoughts
This is one of those projects that looks far more polished than the effort it actually takes. In an afternoon, you’ll have a handmade piece that adds warmth and function to any room — and honestly, it makes a great handmade gift too.
Reminder: This ladder is for decorative use only and is not designed for climbing. Always use proper safety precautions when building and handling tools.
Leave a Reply